Monday, September 29, 2014

Spicy Squash Season Penne

Hey everyone! Fall is finally here, and this month, we've got lots of awesome fall recipes for you!

Okay, before I start, I have some HUGE NEWS! I was recently nominated for Best Food Blog in the Best of Western Washington (via KING5 News) competition, and I'm currently ranked in first place holding 15.6% of the vote! This is a huge honor for me, and I really want to win. How awesome would it be to be just a teenager and win this regionally known contest? I'd love to win, but I need your help! Please vote at the following link, and share the link with everyone you know on Facebook/Twitter/Instagram/tumblr/etc.! Voting goes all the way until October 24th, so while I may be in first now, that could change over the course of the next few weeks. Please vote here: http://best.king5.com/teens-can-cook-too/biz/688717 

I'm not like most other teenage girls my age, who anxiously await fall because of Pumpkin Spice Lattes from Starbucks. My biggest reasons for wanting fall to arrive are sweaters, hot tea and squash! Squash is so much more versatile than you think, and I really want to show you guys that, so you'll probably be seeing a lot of squash recipes this month. You better like squash, and if you don't, learn to like it. That's an order. You're missing out if you don't!

One fall favorite of mine has been a Winter Squash Curry Soup, which is a puree of squash with heavy cream and curry powder. It's not exactly the healthiest thing, but I love the curry element to the dish. Whenever I think of curry, I think of spicy foods because I always make my curries fairly hot. This inspired me to experiment with the idea of a spicy squash dish rather than a curry squash dish, leaving the unconventional element without ripping off a previous concept I've seen. If you don't like spicy things, don't worry! You can still easily make this dish by toning down the spice factor or omitting the hot spices completely. There's still a lot of flavor in the rest of the dish, especially in the amazingly creamy sauce. This honestly turned out better than I expected, so I suggest you give it a try! Serve it with roasted pork chops and applesauce, roasted chicken with thyme, or any other protein-packed entree. 


Spicy Squash Season Penne
Serves 6 - 8 

Ingredients
1 (16 oz) bag whole-wheat penne
1/2 of a large butternut squash
3 tbsp coconut oil
1/2 tsp dried thyme
1/2 tsp dried oregano
1 cup unsweetened almond milk 
1 tsp nutritional yeast (optional) 
1/2 tsp cayenne pepper
3/4 tsp chili powder
1/2 tsp crushed red pepper flakes
12 large crimini mushrooms
1/2 of a large yellow onion, thinly sliced 
2 large garlic cloves, peeled and minced 
Salt and pepper, to taste 

Preparation
1. Preheat the oven to 425 degrees Fahrenheit. Take the half of the squash, which should have been cut from the squash by slicing it lengthwise down the center, and remove the seeds. Coat in 1 tbsp of coconut oil, using your hands to warm up the oil a bit and spread it evenly. Don't worry about clumps at all - since the oil is a solid at room temperature, it's bound to do this, but it will liquefy in the oven. Season with dried thyme, dried oregano, salt and pepper. Bake, face down, for 45 minutes to an hour, until fork tender. Do your homework while you wait! Remove from heat and let cool.

2) While the squash is cooling, you can bring a large pot of water to a boil. Salt the water and add the pasta. Cook according to the directions on the package. Drain and put the noodles back into the pot.
  
3) Once the squash is completely cool, scrape out all of the edible flesh into a bowl and place the contents in a Vita-Mix, food processor or blender. Add the almond milk, nutritional yeast, cayenne pepper, chili powder, crushed red pepper flakes, salt and pepper. Blend on a medium speed and gradually increase to high until a super creamy consistency is reached. It should also be fairly thick, like the consistency of soft-serve ice cream. If you want it thinner, just add more almond milk. Adjust the seasonings and set the sauce aside.

4) Heat the remaining coconut oil in a large skillet at medium-high heat. Add the onions and saute until just coated in oil. Then, let them sit for about 3-5 minutes, until they begin to get golden brown. Stir and let sit for another 3 minutes. Repeat this process until they look almost caramelized. Add the garlic, mushrooms, salt and pepper. Incorporate the ingredients in thoroughly and saute until the mushrooms are tender, about 3-5 minutes. Remove from heat.

5) Combine the noodles, pasta sauce and mushroom mixture in the large pot. Stir thoroughly and serve. Enjoy!

Be sure to follow me at all the social media sites below to keep track of upcoming recipes from me and the team members, and for Best of Western Washington updates! 


Stay healthy!
- Madeline 


Sunday, September 14, 2014

3 Sauces, Infinite Possibilities

Hey, everyone! I hope you've been having a few great first weeks of school. My first two weeks have actually been really great. Junior year isn't as scary as everyone says.... well, at least not yet. 

Cooking during the school year can be really hard - especially if you pack a lunch to school (which I highly encourage). One thing that is always a life saver in the mornings is frozen pesto. My dad or I will make pesto and then freeze it in an ice cube tray. In the morning, all you do is boil some whole-wheat pasta, defrost the pesto cube, stir them together and put them in a Thermos. Adding vegetables is always a good idea, too. I know, I know, what a typical thing for me to say, but it really does make it taste better. I've got to admit, though, pesto can be a little boring if I have it every single day. That's why I've created three amazing and very different sauces that you can freeze. The best part is that you can use them for so many things! Don't just feel limited to lunches here - use these during dinner and even breakfast, too. 

My favorite ways to use these sauces are, but are not limited to:

  • Spread over meat/fish and grill/bake to perfection
  • Toss in some whole-wheat pasta and add veggies, beans and/or meat of your choice
  • Use as a condiment for some super snazzy sandwiches 
  • Dip chopped vegetables in them 
  • Spread on whole-wheat toast with avocado and freshly ground pepper 
  • Flavor any cooked whole grain (quinoa, brown rice, bulgur, etc.) with the sauce of your choosing and jazz it up with some colorful veggies 
  • Add to any soup or stew
  • Package them in jars and give them to friends as gifts
  • Whatever your heart desires!
The absolute best part about these sauces is the fact that they all have the exact same preparation process. They take about ten minutes to make each. Make them all at once on a Sunday so you're all stocked up for the week, or try them out one at a time. Your choice! Enjoy!

From left to right: Classic Pesto, Roasted Red Pepper and Cilantro Pesto, and Sunshine Sauce 


3 Sauces, Infinite Possibilities

Ingredients for Classic Pesto (Makes about 2 cups) 
1 (12 oz) package of fresh basil, leaves only 
3 large garlic cloves, peeled 
1/4 cup pine nuts 
1/3 cup Parmesan cheese 
The juice of half of a large lemon 
Salt and pepper, to taste 
Extra-virgin olive oil 

Ingredients for Roasted Red Pepper and Cilantro Pesto (Makes about 1.5 cups)
2 cups fresh cilantro
1 cup pre-washed baby spinach
3 large garlic cloves, peeled
1/3 cup roughly chopped roasted red peppers
1/4 cup raw, unsalted almonds (it doesn't matter whether they're whole, slivered or sliced) 
The juice of 1/2 of a large lime 
1/2 tsp cayenne pepper
1/4 tsp smoked paprika 
Salt and pepper, to taste 
Extra-virgin olive oil 

Ingredients for Sunshine Sauce (Makes about 1 cup) 
1 cup raw, unsalted cashews, soaked in a bowl of water for 30 minutes 
2 large garlic cloves, peeled
1 large handful of fresh basil
The juice of 1/2 of a large lemon
The juice of 1/2 of a large lime 
1/4 tsp crushed red pepper flakes 
Salt and lemon pepper/pepper, to taste 
Extra-virgin olive oil 

Preparation for All Sauces
Combine all the ingredients in a Vita-Mix or food processor. Remove the plastic plug from the lid. Start blending on a low speed. Gradually drizzle in a couple tablespoons of olive oil, increasing the speed as you go. Add more olive oil and/or water if you want the consistency to be smoother or thinner. Stop blending once you're happy with the consistency. Adjust the seasonings as needed. Transfer to an ice cube tray and freeze to save for later use. When you want to use it later, simply pop a cube of sauce out of the tray and defrost in the microwave for about 20 seconds. Enjoy!

Thanks for reading! Please share your recreations with me using #teenscancooktoo on Instagram! I love seeing what you guys create. Make sure you share this with all your friends at the social media sites below: 


Stay healthy!

- Madeline

Sunday, September 7, 2014

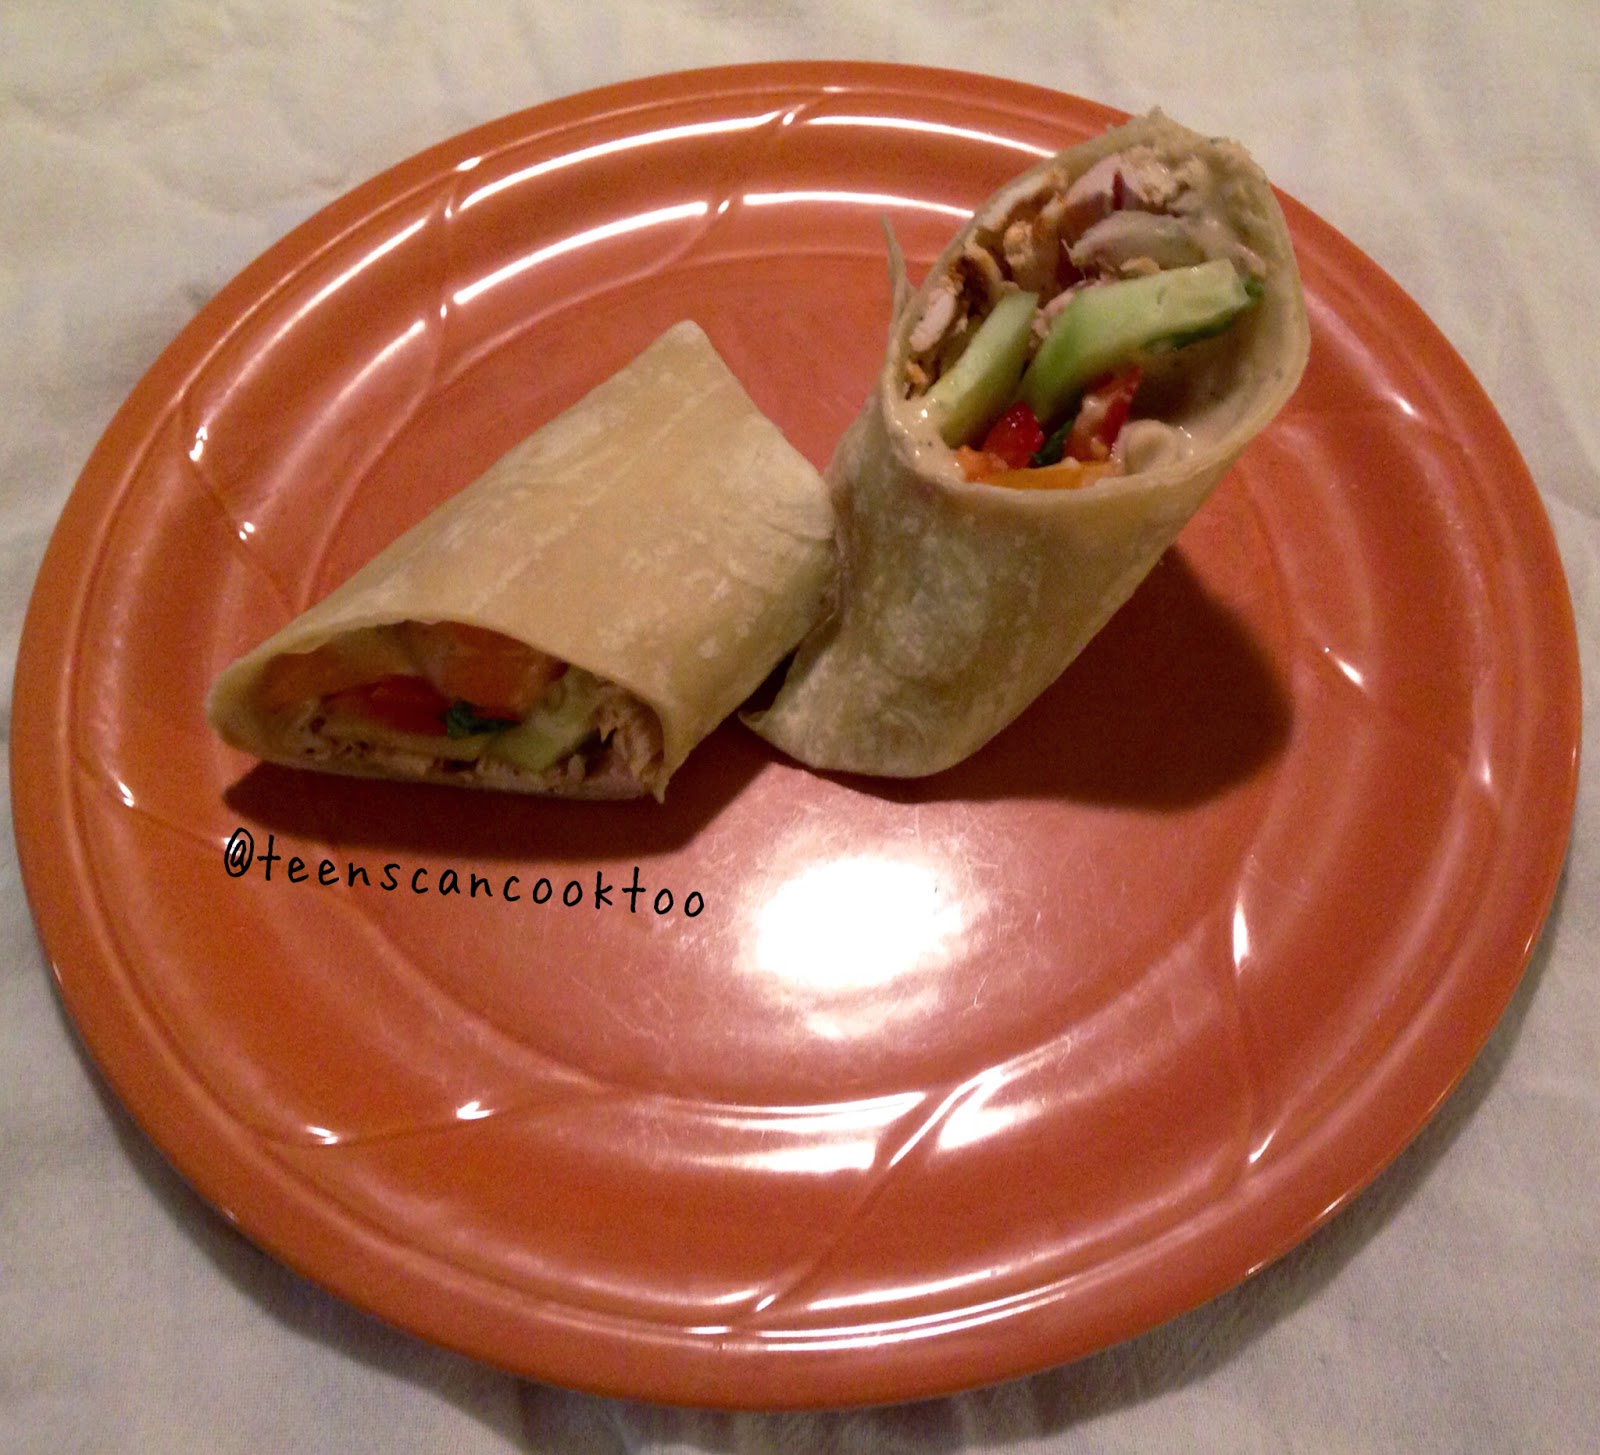
Chicken and White Bean Hummus Wraps

Hey, everybody! Teens Can Cook, Too is FINALLY back! I'm so sorry that I took such a long break this summer. I was doing so much and it just got too overwhelming. I promise you that I'm back for the entire school year, and you'll also be hearing a lot from the team members as well. We'll be posting more videos and keeping more active on social media, so keep an eye out!

As usual, we'll be sticking with the monthly themes. This month is: Back to School! Unfortunately, school is starting, which means our eating patterns are shifting into a more structured routine. It also means there's less time to cook, making it difficult to stay healthy. I'm really trying to set a solid foundation and routine for health this fall that will hopefully carry into the remaining seasons. This theme will have everything you need as school starts again: quick lunch recipes, super quick breakfasts that you can make even when you're rushing out the door, dinners that can be prepared and eaten in a short amount of time, and so much more. 

This week, I have a quick lunch recipe. I just made this for dinner, and I can honestly say that these are the best wraps I've ever made. The best part is that you can use a rotisserie chicken from your favorite grocery store - just be sure that the chickens were raised humanely. You can also leave the chicken out to make it vegan. The recipe may also make a little extra hummus, so save it and pack it as a snack for school the next day! Enjoy!


Chicken and White Bean Hummus Wraps 
Makes 4 whole wraps/8 half-wraps 

Ingredients
4 organic 8-inch tortillas, preferably whole-wheat
2 cups shredded rotisserie chicken, preferably antibiotic free and fed a vegetarian diet
1/2 of a medium-sized cucumber, 
1/2 of a red bell pepper
1 cup orange cherry tomatoes, halved 
1/2 cup julienned basil 
1/8 tsp smoked paprika
1/4 tsp cayenne pepper
Salt and lemon pepper/pepper, to taste 

For hummus:
1 (15 oz) can white beans, rinsed and drained 
2 large garlic cloves, peeled
2 tbsp fresh lemon juice 
A pinch of smoked paprika
1/4 tsp cayenne pepper 
1/4 tsp dried oregano
1/4 tsp dried thyme 
1/4 tsp dried parsley 
1/4 tsp dried basil 
Salt and lemon pepper/pepper, to taste 
2 tbsp extra-virgin olive oil 

Preparation 
1. Combine all the hummus ingredients, except the olive oil, in a Vita-Mix or food processor and begin blending on a low speed. As it blends, drizzle in the olive oil. Gradually increase the speed to high until you reach a very smooth consistency. If you want it to be thinner, add water. Adjust the seasonings and set aside.

2. Peel the half of the cucumber that you're using. Cut it in half lengthwise, and then thinly slice it. Cut the top off of the bell pepper and cut perpendicular to the membrane, leaving a hunk of seeds behind. Thinly slice half of the pepper. Set aside with other veggies.

3. Combine the paprika, cayenne, lemon pepper/pepper and salt with the shredded chicken. Stack the tortillas on top of each other, placing paper towels in between each of them. Microwave for 15 seconds on high to heat them, making them more pliable. 

4. To assemble the wrap, spread 1/4 cup of the hummus onto the tortilla evenly with a knife or the back of a spoon. On one end of the tortilla (about 2 inches from the bottom), add the chicken, cucumber, pepper, tomatoes and basil. Make sure you have about 1.5 inches on either side to fold the edges of the tortilla in. Fold these edges in, and then fold the bottom over. Carefully roll it away from yourself, tucking the edges in as you go. Keep it as tight as possible. Once it's all rolled up, cut it at an angle down the middle. To save these for school lunches, wrap each half in plastic wrap and refrigerate. Just pop as many halves as you'd like in your lunch with an ice pack. Enjoy!

That's all for this week! As much as we all don't like going back to school, I hope you have a great first few weeks back in the classroom. Remember to make healthy food choices! Please share your recreations with me using #teenscancooktoo on Instagram, and follow us at all the social media sites below: 


Stay healthy!
- Madeline 

Sunday, July 6, 2014

Warm Arugula Salad with Portobello Mushrooms and Pears

Hey, everybody! I want to start out with an apology for not posting at all during the Vegetarian Challenge. I'm so lame. I really am. I am ACTUALLY back this time for good, though! I have a lot of really fun things planned for the rest of the summer, including a lot of new videos! 

Since I didn't update you at all on the vegetarian challenge, I guess I'll give a little summary on how I felt about the whole thing. The first day was hard because I ate at people's houses and such, so I had no control over what I could eat. I had barely any protein and a lot of carbs. The next two days were better because I had clean, healthy, protein-packed foods, but I got a stomach ache as I was readjusting back to a cleaner diet than I had over the weekend. Days 4 - 6 were great. I tried all these new recipes, got more and more protein each day, and felt really good! Aaaaand then, I started to tank. I just didn't feel motivated to keep up with cooking and cleaning and cooking and cleaning and cooking and cleaning and cooking and cleaning. That's a lot of cooking and cleaning. I was making food only for myself, and I really just wanted to make a family meal, but I didn't get around to it until towards the end of the challenge. 

The main take-away for me was that being a vegetarian and monitoring myself so closely really did improve the balance in my diet. When I eat meat, I tend to just eat fruits and veggies and carbs (generally good carbs, like whole-wheat pasta) all day and then eat all my protein during dinnertime. I really should be eating protein throughout the day, and being a vegetarian really helped me do that. With the exception of protein powder, it's hard to get more than 25g of protein in one serving of a vegetarian meal, and the average woman needs 46g, so I had to really work at maintaining this throughout the day. I've totally lost that motivation and maintenance since the challenge ended, and I really need to get back on it. The vegan challenge, which starts on Thursday (yay!), is going to be especially hard for me because I've been eating a lot of cheese. A slice of pepper jack cheese was a go-to snack for me when I needed some protein in the middle of the day, and I can't do that on Thursday. I also ate a lot of ice cream (don't worry, guys - it was organic!) on the Fourth of July.

Alright, enough of me blabbering about my experience as a vegetarian. Here is the recipe you've been waiting for! I made this on Thursday night, and OH MY GOD, WAS IT GOOD! I can honestly say that this is the best salad I've made all year. My mom said it was "restaurant quality." I should probably stop bragging... but seriously, you've got to try this. This is a sure way to impress adults when your parents have company for dinner. You could even make this for a date, and I promise you that this salad is a guarantee into your date's heart. It's also SUPER EASY! You could whip this out in 20 minutes, but it looks like it took you hours of preparation since the flavors are so complex. 


Warm Arugula Salad with Portobello Mushrooms and Pears
Serves 4 

Ingredients
2 medium-sized portobello mushrooms
1½ Bartlett pears
½ tsp dried thyme
2 tbsp extra-virgin olive oil
2 tbsp balsamic vinegar
1/3 cup freshly shaved Pecorino Romano cheese
1/4 cup toasted pine nuts
6 loosely packed cups pre-washed baby arugula
Salt and pepper, to taste

For dressing:
½ of a Bartlett pear, cut into large chunks
3 tbsp balsamic vinegar
1 tbsp red wine vinegar
1 tbsp extra-virgin olive oil
2 tbsp water
½ tsp Italian seasoning
1/4 tsp lemon pepper (optional - use regular pepper if you don't have any) 
Salt, to taste

Preparation
1. Preheat the oven to 400 degrees Fahrenheit. Using a dry towel, gently rub any dirt off of the mushroom caps. Cut off the stems and remove the gills on the underside using a small spoon. Cut the mushroom into 3/4-inch pieces. Remove the core from the pears and cut into 3/4-inch pieces as well. Transfer mushrooms and pears to a bowl and coat with olive oil, balsamic, thyme, salt and pepper. 

2. Place parchment paper/a silicon mat on a baking sheet. Transfer the mushrooms and pears to the baking sheet. Bake for 10 - 12 minutes, until the mushrooms are tender and the pears are soft. Give it a taste test to make sure it's done. Remove from heat.

3. While the mushrooms and pears are baking, combine all of the dressing ingredients in a Vita-Mix or blender. Blend on a low speed and gradually increase to medium. Blend until very smooth. If you find that it is too thick for your taste, add more water. 

4. Combine the roasted mushrooms and pears, the dressing, and the remaining salad ingredients in a large bowl together. Toss thoroughly and serve immediately. 

There you go! I hope you all enjoy this recipe! Out of everything I've ever posted, this is hands-down one of my favorite recipes, and you will really be missing out if you don't give this one a try. Please, please, please share your recreations with me using #teenscancooktoo on Instagram! Don't forget to follow us at all the social media handles below as we embark on our vegan challenge starting on Thursday! I will be out of town during part of it, so it'll be really interesting to navigate my way through being vegan when I don't have any natural markets or fancy kitchen appliances available. 


Tuesday, June 17, 2014

Peanut-Coconut Rice Noodles with Edamame and Green Veggies

Hey everybody! I'm a vegetarian now! Well... not forever; the two week vegetarian challenge started yesterday. Isaac, Isabel, Annika and I are participating, and the rest of the team members are going to share recipes with us here and there. For the next two weeks, you'll be seeing vegetarian recipes and updates from everyone participating in the challenge. We've all been filling out meal logs every day to track our protein intake, progress and feelings, and we'll be sharing a few of those meal logs with you so you have a sense for how we're doing.

Today's recipe is an Asian-inspired rice noodle dish. I have wanted rice noodles with peanut sauce for such a long time, but unfortunately, my mom is pretty sensitive to peanuts, so I didn't have the chance to make it until yesterday. This dish actually has a decent amount of protein per serving (I estimate about 13g, but that wasn't too carefully calculated). That's not as much as 4 oz of meat, but if you eat other sources of protein during the day, you can get the amount you need. 46g for women and 56g for men are the recommended amounts of protein that you need each day. If you added tofu to this, the amount of protein would drastically increase. Enjoy this recipe!

Peanut-Coconut Rice Noodles with Edamame and Green Veggies
Serves 4 

Ingredients
1 (14 oz) pack of 5mm dry rice noodles 
1 pack of frozen edamame beans (with shells) 
1 tbsp sesame oil 
3 or 4 green onions, finely chopped
2 garlic cloves, peeled and minced
The zest of 1 lime 
1 tbsp Braggs liquid aminos (substitute soy sauce, hot sauce, or any other favorite Asian condiments) 
2 cups snap peas
3 cups pre-washed baby spinach  
1/4 cup roasted peanuts, finely chopped
1 lime, cut into 4 wedges 
1/4 cup cilantro, finely chopped 
Salt and pepper, to taste 

For peanut sauce: 
3/4 cup all-natural creamy peanut butter
4 tsp low-sodium soy sauce 
1 tsp Braggs liquid aminos (optional) 
1 tsp sesame oil 
1/2 tsp cayenne pepper 
3/4 cup - 1 cup lowfat coconut milk (from a can - not a dairy milk substitute!) 
Water 

Preparation
1. Put the noodles in a large bowl. Try to not to snap them in half if you can. Boil about 4 - 6 cups of water and pour the water over the noodles. Stir every 2 minutes or so to ensure that the noodles don't stick to each other. Soak for about 10 - 15 minutes, testing the noodles frequently until they are tender and cooked through. Be careful about the noodles - if they sit for too long, they'll get mushy. Drain in a colander and rinse with cold water to stop the cooking process.

2. While the noodles are soaking, combine all the peanut sauce ingredients. Use a whisk to ensure a smooth texture. The consistency should be very thin - not quite watery, but still very thin. Add more coconut milk or water if you want it thinner. If the sauce seems thinner than what you prefer, go with it! It will thicken when you stir it into the veggies later, and once it thickens, its consistency is perfect. 

3. Bring a large pot of salted water to a boil. Add the frozen edamame. Wait for reboil and boil for 5 minutes. Drain in a colander and rinse thoroughly with cold water. Pop the edamame out of their shells by pushing down the bean. Discard the shells and set the beans aside. 

4. Heat the sesame oil in a wok or 13-inch diameter non-stick pan. Any type of pan will do as long as its walls are fairly tall. Add the green onions, garlic, lime zest, and liquid aminos. Cook for about 2 minutes. Add the snap peas and edamame, sauteing for about 3 minutes. Add the peanut sauce, spinach, salt and pepper. Cook for another 2 minutes, until the spinach is slightly wilted. Note: you probably won't need much salt because the sauce has soy sauce in it. Give it a taste and determine whether you need any salt at all. 

5. Remove the pan from the heat. Add the noodles and stir until completely coated in sauce and veggies. Serve in individual bowls. Top each serving with peanuts and cilantro, along with a lime wedge on the side so each person can squirt lime juice on their noodles. Enjoy!

I hope you enjoyed that recipe! Please share your recreations with me using #teenscancooktoo, and share all other vegetarian recipes that you love with me on Instagram and Twitter too! 

As I said before, the team has been updating each other with meal logs. I won't be sharing them all, but I'll be sharing the ones that are most interesting. Some will also be shared on Instagram and Facebook, so make sure you're staying up to date! This week, I'm sharing Isaac's meal log from day 1. Isaac has a really good idea of how to keep his meals balanced and healthy, and he has been most successful with getting enough protein. His dad has also experimented with lots of ways to eat (vegetarian, vegan, and more!), so he has a lot of knowledge about how a person makes a lifestyle change like this. Enjoy what he had to say!

Day 1:
Breakfast: Cheerios/oats with chocolate hemp milk
Lunch: Qdoba (Rice, beans, chips, salsa)
Dinner: Beans/Lentils with salad dressing, grilled zucchini and asparagus, quinoa
Snacks: Apple, banana, orange juice, vegan protein powder after waking up and before bed
Estimated Protein: 85g
Did you get enough fruits and vegetables today? yep!
What were some challenges you faced today? Trying to get enough protein in comparison to usual diet is difficult, I will need to take advantage of nuts, and maintain protein shake regiment.
Do you feel physically different? More tired, more energized, etc.? Nothing so far, a little hungry.
What is something that has been going really well for you? support from my family, Dad in specific because he is vegetarian/vegan, I don’t really miss eating meat so far
How can you make tomorrow better? We made a big batch of quinoa and beans/lentils tonight so I could use them as snacks for the rest of the week, which is good because they are high protein, and good substantial carbs.

Other Comments: My dad says the first “changes” happen within the first 3 days with a new diet, mentally and physically, which I have noticed when he has dabbled with new diets can drastically affect someone's mood/energy etc… I'm interested to see how or if I develop similar symptoms, especially during finals week, yay, we will certainly see.

Thanks for reading! Don't forget to follow us at all the social media sites below: 


Stay healthy!
- Madeline, Isaac, Annika and Isabel


Tuesday, June 10, 2014

Chipotle-Inspired Sofritas Bowl

Hey, everyone! Happy summer! I know most people are in school and that it's technically still springtime, but I am done with school, so I guess I can say it's summer. I'm so excited to have all this time to cook and get the team together to share fun recipes with you guys.

Everyone loves Chipotle, right? I mean, who doesn't? It's one of my favorite restaurants because it's tasty, fast, AND they are so careful about where their ingredients are coming from. I love that a place centered around bettering the food system has become so incredibly popular internationally. Unfortunately, I live 15 minutes away from the closest Chipotle. That means that I can't satisfy my Chipotle cravings 24/7. This recipe for Sofritas will teach you how to make a Chipotle-inspired vegetarian meal at home that will satisfy the whole family! This doesn't taste exactly like what you can order at Chipotle, but it's as close as I could get it with the resources I had. This recipe just includes the toppings I used, but you can always try making your own version of Chipotle's guacamole or salsa verde or whatever else you like in your order. 


Chipotle-Inspired Sofritas Bowl
Serves 4

Ingredients
2 (15 oz) cans black or pinto beans 
1 romaine heart, loosely chopped 
1/2 cup rBST-free shredded Mexican cheese blend 

Cilantro-lime rice: 
2 cups white rice (use brown rice if that's what you usually order) 
The juice of 2 limes 
1/2 cup cilantro, finely chopped 
Salt and pepper, to taste 

Corn salsa: 
2 small ears of corn, shucked and silk removed
1/4 cup red onion, finely diced
1/4 cup red bell pepper, finely diced
1/4 cup tomato, finely diced
2 tbsp cilantro, finely chopped
The juice of 3/4 of a lime 
1/2 tsp cayenne pepper 
Salt and pepper, to taste 

Sofritas: 
2 (10 oz) packages extra-firm tofu 
1/4 cup chipotle in adobo sauce OR 1/4 cup chipotle salsa 
2 small poblano peppers OR 1 large green bell pepper with 1 jalapeño pepper 
1/2 tsp cumin
The zest of 1 lime 
Salt and pepper, to taste 
2 tbsp extra-virgin olive oil 
*I used the chipotle salsa, green bell pepper and jalapeño pepper in mine. Chipotle says in their description of Sofritas that they use poblano peppers, but I didn't have any. Try it both ways and decide which one you think tastes closer to the actual Chipotle version. 

Preparation
1. Bring 4 cups of water to a boil. Add the rice and reduce the heat to low. Cover and cook for 20 minutes. 

2. Remove the tofu from the packages and set them on a slanted surface to drain. I like to set a cutting board on the counter and the sink so that the tofu can drain into the sink. Let drain completely. 

3. Combine the chipotle in adobo/chipotle salsa, poblano peppers/green bell pepper and jalapeño pepper, cumin, lime zest, salt and pepper in a food processor. Pulse for about a minute, until very smooth and sauce-like. 

4. Pat the tofu dry with a paper towel. Using your hands, crumble the tofu up into small crumbles. It should look somewhat like crumbled feta cheese. Transfer the sauce from the food processor to the bowl with the crumbled tofu and stir well. It should look like what is pictured below. Let marinate for about 10 - 15 minutes. This doesn't need to be exact - just prepare the corn salsa while it sits to kill some time. 
5. While the sofritas are marinating, take your shucked corn and remove the stems. This will create a flat surface on the bottom for the corn to stand on. Using a sharp knife, carefully slice down the side of the corn, removing a strip of corn kernels. Turn the corn and remove another strip until all the kernels have been removed. Repeat this process with the other ears of corn. Put the kernels in a bowl and add the rest of the salsa ingredients. Mix well and adjust seasonings accordingly. 

6. Heat the olive oil in a large skillet over medium-high heat. Add the sofritas. Stirring fairly frequently, cook for about 5 - 7 minutes. While the sofritas are cooking, heat the beans in a saucepan on a different burner until heated through. Remove the sofritas and beans from heat.

7. When the rice is finished cooking, fluff it with a fork and add the remaining cilantro-lime rice ingredients. Stir well and adjust seasonings accordingly. 

8. To assemble a bowl, add the ingredients in the following order: rice, beans, sofritas, corn salsa, cheese and lettuce. You can always add any other toppings that you like. This order is crucial because it's the same order that they go in at Chipotle! Serve and enjoy. 

I hope you enjoy this recipe! Please give it a try so you can have a little taste of Chipotle in your own home, and share your recreations with me using #teenscancooktoo on Instagram. Hey, you could even share them with Chipotle on Instagram or Twitter! 

Finally, I want to talk to you about the Teens Can Cook, Too vegetarian challenge that is starting THIS SUNDAY! Isabel, Isaac, Annika and I will be going vegetarian from June 15th to 28th, and the other team members will be testing out our vegetarian recipes here and there. We want all of you to participate if you're up for it! The whole point is to get a taste of the challenges vegetarians face as well as experiencing the benefits of being a vegetarian. You must eat at least 1.5 cups of vegetables, 1 cup of fruit and get a decent amount of protein each day so you can assure that your body isn't deprived of the nutrients it needs. Those of us who are participating will be sharing meal logs and comments from each day here on the blog. If you want to participate, send me pictures on Twitter and Instagram using #teenscancooktoo of your vegetarian meals so we can see what you're up to. This will be a really fun way for the team to interact with the readers, but it will only work if you participate along with us! Keep up with us on all the social media sites below so you can interact: 


Stay healthy!  
- Madeline 


Monday, June 2, 2014

Tofu Parmesan

Hey everybody! First, I'd like to apologize for neglecting this blog lately. This spring has been so busy, but now that school is almost over, I will have more than enough time to dedicate myself to this blog! The team and I have some very exciting themes and projects coming up this summer that you won't want to miss.

The theme this month is... Vegetarian Meals! Since there are so many vegetarians out there, I figured I would dedicate a whole month to giving you guys some great recipes. Of course, you don't have to be a vegetarian in order to enjoy these; I highly recommend that meat eaters give these recipes a try. Start having a Meatless Monday and try these recipes out! 

Why go vegetarian? I'm sure you've all heard the arguments against being a vegetarian, mainly the concern that you won't be getting enough protein. However, you can find protein in lots of other food sources! Tofu, beans, and even some whole grains (like quinoa) contain the protein that your body needs. Make sure you are eating a variety of foods so that your body gets all the vitamins and minerals it needs. Lots of fruits, veggies, protein, nuts, and seeds will make your body very happy. A lot of people go vegetarian and end up with problems, like anemia, because they aren't getting the nutrients they need. It's really easy to cut out meat and just eat carbohydrates, but that is not the way to go! The more colors and variety you have, the better.

Have you wanted to go vegetarian for awhile but never had the time? Have you ever wanted to try it out just to see what it's like? Then you are the person to join the Teens Can Cook, Too team on a vegetarian two-week challenge! From June 15th to June 28th, a few members of the Teens Can Cook, Too team will be going vegetarian and blogging about their experiences. We invite you to join us for those 14 days and interact with us via social networking so we can provide tips and inspiration. We've set a few guidelines so that we all try being a vegetarian in the healthiest way possible, and they are as follows:
- No meat (including fish) in any form
- Eat at least 1.5 cups of vegetables and 1 cup of fruit each day 
- Have at least one source of protein per day
- Keep track of all your meals and write a few comments about each day 
We will be posting our thoughts, comments and meals every Sunday with each recipe so that you guys can see how we've been enjoying the new change. I strongly suggest that all my readers participate. From people who eat meat in every meal to pescatarians that want to try giving up fish for two weeks, this challenge will be accessible and valuable! Plus, it's during the summer, so you don't have to worry about juggling a change in diet with schoolwork. If you're already a vegetarian, don't worry - there will be a challenge just like this next month, only we'll be going vegan! 

Onto the recipe! So... tofu. Oh tofu. So many people hate tofu, and I honestly don't blame them. Most of the tofu I've had has been prepared terribly, but there are definitely ways to make it tasty! So far, my favorite methods of preparation are tofu in an Asian stir-fry and marinated tofu that has been grilled or pan-seared. I also love Chipotle's sofritas, which is a scrambled tofu option that they offer. It's my new favorite thing and I think it tastes exactly like ground turkey! Give these things a try as a starter. I've never had tofu outside of Asian or Mexican food, so I figured I would branch out with my recipe and go the Italian route. 

Okay, I know what you're thinking. "This is GROSS! Parmesan tofu? Yuck!" But I promise you that it is better than it looks! The basis for the method of preparation comes from my mom's way of making homemade chicken strips. Hey, there's something you're probably familiar with! The preparation is easy and you will satisfy a family of four easily with this. 

Mozzarella and basil not pictured - I didn't have any. Use these ingredients and I'm sure it will be tastier than mine! 
Tofu Parmesan
Serves 4 

Ingredients
1 (16 oz) package extra-firm tofu 
2 free-range eggs 
2 tbsp rBST-free milk 
About 1/2 cup of whole-wheat flour
1/2 tsp garlic powder 
1/2 cup panko breadcrumbs 
4 medium-sized garlic cloves, peeled and minced 
1/4 cup rBST-free shredded parmesan cheese, plus extra for garnish 
3/4 tsp Italian seasoning
1/8 tsp lemon pepper 
2 small zucchini 
3 red bell peppers
1/4 cup balsamic vinegar
3 tbsp extra-virgin olive oil
Olive oil cooking spray
1/2 cup rBST-free shredded mozzarella cheese
1 1/2 cups cherry tomatoes, halved vertically 
1/2 cup julienned basil 
Salt and pepper, to taste 

Preparation
1. Remove the tofu from the package. Set a cutting board on a slanted surface and place the tofu brick onto the cutting board. Let the tofu drain for at least 15 minutes, catching the drippings in a sink or trash can. Slice the brick into 1/2-inch slices vertically. 

2. While the tofu is draining, prepare the veggies. Slice the top off of the pepper, and turn it so that the hunk of seeds in the middle is facing the ceiling. Carefully cut perpendicular to each piece of white membrane, creating four sections. Throw out the hunk of seeds. Then, slice each pepper segment in half vertically. Repeat this step with the other peppers. For the zucchini, slice the top and bottom off. Cut into 3-inch sections and slice into 1/8-inch slices vertically. Put the zucchini, red bell pepper, balsamic, 2 tbsp of the extra-virgin olive oil, lemon pepper, 1/4 tsp of the Italian seasoning, salt and pepper in a bowl. Mix well and let marinate while you complete steps 3 and 4. 

3. Put the breadcrumbs, cheese, half of the minced garlic, remaining Italian seasoning, salt and pepper in a food processor. Pulse until the crumbs and cheese become a very fine, crumbly mixture. Pour into a shallow bowl and set aside. Mix the flour, garlic powder, salt and pepper in another shallow bowl, and beat the eggs and milk together in another shallow bowl.

4. Take a tofu slice and coat in the flour mixture. Coat generously in the egg mixture, and then completely cover in the breadcrumb mixture. Repeat this step with the remaining tofu slices.

5. Spray a griddle or large skillet with a bit of olive oil spray. Heat to medium-high heat (about 350 degrees Fahrenheit on a griddle). Add the tofu slices and marinated veggies. Try to fit as many of the veggies as you can, but if there are too many, prepare them in two batches. Cook the tofu and vegetables for about 3 minutes on each side. When you flip the tofu, sprinkle mozzarella over all the slices and let it melt as it finishes cooking.

6. While the tofu and veggies are cooking, put the cherry tomatoes, remaining garlic, remaining extra-virgin olive oil, salt and pepper in a small saucepan. Heat to medium heat and saute for about 5 minutes, until the tomatoes are soft and heated through. Remove from heat.

7. To serve, place a bed of veggies in the center of the plate. Top with a few slices of cheesy tofu. Garnish the tofu with a spoonful of the cherry tomatoes, 2 tbsp of basil and extra parmesan cheese. Enjoy! 

Enjoy this recipe! This was a fun experiment for me, and I'd love it if you gave it a try. Please share your recreations with me using #teenscancooktoo on Instagram! Follow Teens Can Cook, Too at all the social media sites below: 

YouTube: http://www.youtube.com/channel/UCdiKFPsBoLhYw2W42P7LvKQ 

Stay healthy!
- Madeline 


Sunday, May 18, 2014

Gluten-Free Berry Crumble

Hey everybody! Since springtime is upon us, I figured I would share a recipe using my favorite spring fruit: berries! While local (from Washington) berries aren't quite in season, lots of berries from California are in season, and I've been eating lots of them lately. I had been toying with the idea of making something with berries for awhile, but I couldn't decide what to make. Then, Colleen Ballinger, one of my favorite YouTubers, released a video teaching you how to make her favorite berry crumble. I decided that I could make a healthy version of this recipe to share with you guys, and it turned out super well! I hope you guys enjoy this easy recipe as much as I did! It's gluten-free and vegan, too! 


Gluten-Free Berry Crumble
Serves 8 - 10 

Ingredients
1½ cups fresh strawberries 
1½ cups fresh blueberries
3/4 cup fresh raspberries
3/4 cup fresh blackberries
2 tbsp agave nectar
½ tsp cinnamon

For crumble topping: 
2 cups almond flour 
2 cups gluten-free rolled oats 
½ tsp cinnamon 
1/4 tsp nutmeg
1 cup coconut oil, at room temperature
½ cup agave nectar
1 cup coconut sugar

*You can use any amount of berries as you like as long as it adds up to 4½ cups total! You could use 4½ cups of strawberries, switch the amounts for raspberries and blueberries, etc. Do whatever you like best!
**Frozen fruit will work too, but fresh fruit is preferable.
***If you're allergic to nuts, you can substitute the type of flour you use. Just make sure it's about the same consistency as almond flour, which is ever so slightly coarser than all-purpose flour. A gluten-free flour mix would be great. 

Preparation
1. Preheat the oven to 350 degrees Fahrenheit. Combine the berries, agave nectar and cinnamon in a medium-large bowl. Set aside.

2. Put the ingredients for the topping in a large standing mixer. Using the dough paddle, mix on a medium-low speed (2 or 4 worked well for me). Mix until the ingredients are thoroughly incorporated and make a crumbly topping. 

3. Lay 2/3 of the crumble mixture on the bottom of a 8x13 pan. Distribute evenly across the bottom of the pan and press down into a firm base layer. Top with all of the fruit and lay in an even layer. Finally, sprinkle the remaining 1/3 of the crumble mixture on top of the berries. Keep this loose - it's just a crunchy topping! 

4. Bake for 20 - 25 minutes. The topping should be barely golden brown, and the berries should have released some of their juices. Remove from the oven and let cool on the stove top for 10 minutes. Serve and enjoy! 

I hope you enjoy this recipe! Please give it a try - it's so easy and it's perfect for this season! I made this crumble while making dinner and preparing both dishes only took me half an hour (not including baking time). You can always do homework while it's in the oven, too! Please give it a try and share your recreations with me using #teenscancooktoo on Instagram and Twitter. Don't forget to follow Teens Can Cook, Too on all the social media handles below: 

YouTube: http://www.youtube.com/channel/UCdiKFPsBoLhYw2W42P7LvKQ 

Stay healthy!
- Madeline