Monday, September 29, 2014

Spicy Squash Season Penne

Hey everyone! Fall is finally here, and this month, we've got lots of awesome fall recipes for you!

Okay, before I start, I have some HUGE NEWS! I was recently nominated for Best Food Blog in the Best of Western Washington (via KING5 News) competition, and I'm currently ranked in first place holding 15.6% of the vote! This is a huge honor for me, and I really want to win. How awesome would it be to be just a teenager and win this regionally known contest? I'd love to win, but I need your help! Please vote at the following link, and share the link with everyone you know on Facebook/Twitter/Instagram/tumblr/etc.! Voting goes all the way until October 24th, so while I may be in first now, that could change over the course of the next few weeks. Please vote here: http://best.king5.com/teens-can-cook-too/biz/688717 

I'm not like most other teenage girls my age, who anxiously await fall because of Pumpkin Spice Lattes from Starbucks. My biggest reasons for wanting fall to arrive are sweaters, hot tea and squash! Squash is so much more versatile than you think, and I really want to show you guys that, so you'll probably be seeing a lot of squash recipes this month. You better like squash, and if you don't, learn to like it. That's an order. You're missing out if you don't!

One fall favorite of mine has been a Winter Squash Curry Soup, which is a puree of squash with heavy cream and curry powder. It's not exactly the healthiest thing, but I love the curry element to the dish. Whenever I think of curry, I think of spicy foods because I always make my curries fairly hot. This inspired me to experiment with the idea of a spicy squash dish rather than a curry squash dish, leaving the unconventional element without ripping off a previous concept I've seen. If you don't like spicy things, don't worry! You can still easily make this dish by toning down the spice factor or omitting the hot spices completely. There's still a lot of flavor in the rest of the dish, especially in the amazingly creamy sauce. This honestly turned out better than I expected, so I suggest you give it a try! Serve it with roasted pork chops and applesauce, roasted chicken with thyme, or any other protein-packed entree. 


Spicy Squash Season Penne
Serves 6 - 8 

Ingredients
1 (16 oz) bag whole-wheat penne
1/2 of a large butternut squash
3 tbsp coconut oil
1/2 tsp dried thyme
1/2 tsp dried oregano
1 cup unsweetened almond milk 
1 tsp nutritional yeast (optional) 
1/2 tsp cayenne pepper
3/4 tsp chili powder
1/2 tsp crushed red pepper flakes
12 large crimini mushrooms
1/2 of a large yellow onion, thinly sliced 
2 large garlic cloves, peeled and minced 
Salt and pepper, to taste 

Preparation
1. Preheat the oven to 425 degrees Fahrenheit. Take the half of the squash, which should have been cut from the squash by slicing it lengthwise down the center, and remove the seeds. Coat in 1 tbsp of coconut oil, using your hands to warm up the oil a bit and spread it evenly. Don't worry about clumps at all - since the oil is a solid at room temperature, it's bound to do this, but it will liquefy in the oven. Season with dried thyme, dried oregano, salt and pepper. Bake, face down, for 45 minutes to an hour, until fork tender. Do your homework while you wait! Remove from heat and let cool.

2) While the squash is cooling, you can bring a large pot of water to a boil. Salt the water and add the pasta. Cook according to the directions on the package. Drain and put the noodles back into the pot.
  
3) Once the squash is completely cool, scrape out all of the edible flesh into a bowl and place the contents in a Vita-Mix, food processor or blender. Add the almond milk, nutritional yeast, cayenne pepper, chili powder, crushed red pepper flakes, salt and pepper. Blend on a medium speed and gradually increase to high until a super creamy consistency is reached. It should also be fairly thick, like the consistency of soft-serve ice cream. If you want it thinner, just add more almond milk. Adjust the seasonings and set the sauce aside.

4) Heat the remaining coconut oil in a large skillet at medium-high heat. Add the onions and saute until just coated in oil. Then, let them sit for about 3-5 minutes, until they begin to get golden brown. Stir and let sit for another 3 minutes. Repeat this process until they look almost caramelized. Add the garlic, mushrooms, salt and pepper. Incorporate the ingredients in thoroughly and saute until the mushrooms are tender, about 3-5 minutes. Remove from heat.

5) Combine the noodles, pasta sauce and mushroom mixture in the large pot. Stir thoroughly and serve. Enjoy!

Be sure to follow me at all the social media sites below to keep track of upcoming recipes from me and the team members, and for Best of Western Washington updates! 


Stay healthy!
- Madeline 


Sunday, September 14, 2014

3 Sauces, Infinite Possibilities

Hey, everyone! I hope you've been having a few great first weeks of school. My first two weeks have actually been really great. Junior year isn't as scary as everyone says.... well, at least not yet. 

Cooking during the school year can be really hard - especially if you pack a lunch to school (which I highly encourage). One thing that is always a life saver in the mornings is frozen pesto. My dad or I will make pesto and then freeze it in an ice cube tray. In the morning, all you do is boil some whole-wheat pasta, defrost the pesto cube, stir them together and put them in a Thermos. Adding vegetables is always a good idea, too. I know, I know, what a typical thing for me to say, but it really does make it taste better. I've got to admit, though, pesto can be a little boring if I have it every single day. That's why I've created three amazing and very different sauces that you can freeze. The best part is that you can use them for so many things! Don't just feel limited to lunches here - use these during dinner and even breakfast, too. 

My favorite ways to use these sauces are, but are not limited to:

  • Spread over meat/fish and grill/bake to perfection
  • Toss in some whole-wheat pasta and add veggies, beans and/or meat of your choice
  • Use as a condiment for some super snazzy sandwiches 
  • Dip chopped vegetables in them 
  • Spread on whole-wheat toast with avocado and freshly ground pepper 
  • Flavor any cooked whole grain (quinoa, brown rice, bulgur, etc.) with the sauce of your choosing and jazz it up with some colorful veggies 
  • Add to any soup or stew
  • Package them in jars and give them to friends as gifts
  • Whatever your heart desires!
The absolute best part about these sauces is the fact that they all have the exact same preparation process. They take about ten minutes to make each. Make them all at once on a Sunday so you're all stocked up for the week, or try them out one at a time. Your choice! Enjoy!

From left to right: Classic Pesto, Roasted Red Pepper and Cilantro Pesto, and Sunshine Sauce 


3 Sauces, Infinite Possibilities

Ingredients for Classic Pesto (Makes about 2 cups) 
1 (12 oz) package of fresh basil, leaves only 
3 large garlic cloves, peeled 
1/4 cup pine nuts 
1/3 cup Parmesan cheese 
The juice of half of a large lemon 
Salt and pepper, to taste 
Extra-virgin olive oil 

Ingredients for Roasted Red Pepper and Cilantro Pesto (Makes about 1.5 cups)
2 cups fresh cilantro
1 cup pre-washed baby spinach
3 large garlic cloves, peeled
1/3 cup roughly chopped roasted red peppers
1/4 cup raw, unsalted almonds (it doesn't matter whether they're whole, slivered or sliced) 
The juice of 1/2 of a large lime 
1/2 tsp cayenne pepper
1/4 tsp smoked paprika 
Salt and pepper, to taste 
Extra-virgin olive oil 

Ingredients for Sunshine Sauce (Makes about 1 cup) 
1 cup raw, unsalted cashews, soaked in a bowl of water for 30 minutes 
2 large garlic cloves, peeled
1 large handful of fresh basil
The juice of 1/2 of a large lemon
The juice of 1/2 of a large lime 
1/4 tsp crushed red pepper flakes 
Salt and lemon pepper/pepper, to taste 
Extra-virgin olive oil 

Preparation for All Sauces
Combine all the ingredients in a Vita-Mix or food processor. Remove the plastic plug from the lid. Start blending on a low speed. Gradually drizzle in a couple tablespoons of olive oil, increasing the speed as you go. Add more olive oil and/or water if you want the consistency to be smoother or thinner. Stop blending once you're happy with the consistency. Adjust the seasonings as needed. Transfer to an ice cube tray and freeze to save for later use. When you want to use it later, simply pop a cube of sauce out of the tray and defrost in the microwave for about 20 seconds. Enjoy!

Thanks for reading! Please share your recreations with me using #teenscancooktoo on Instagram! I love seeing what you guys create. Make sure you share this with all your friends at the social media sites below: 


Stay healthy!

- Madeline

Sunday, September 7, 2014

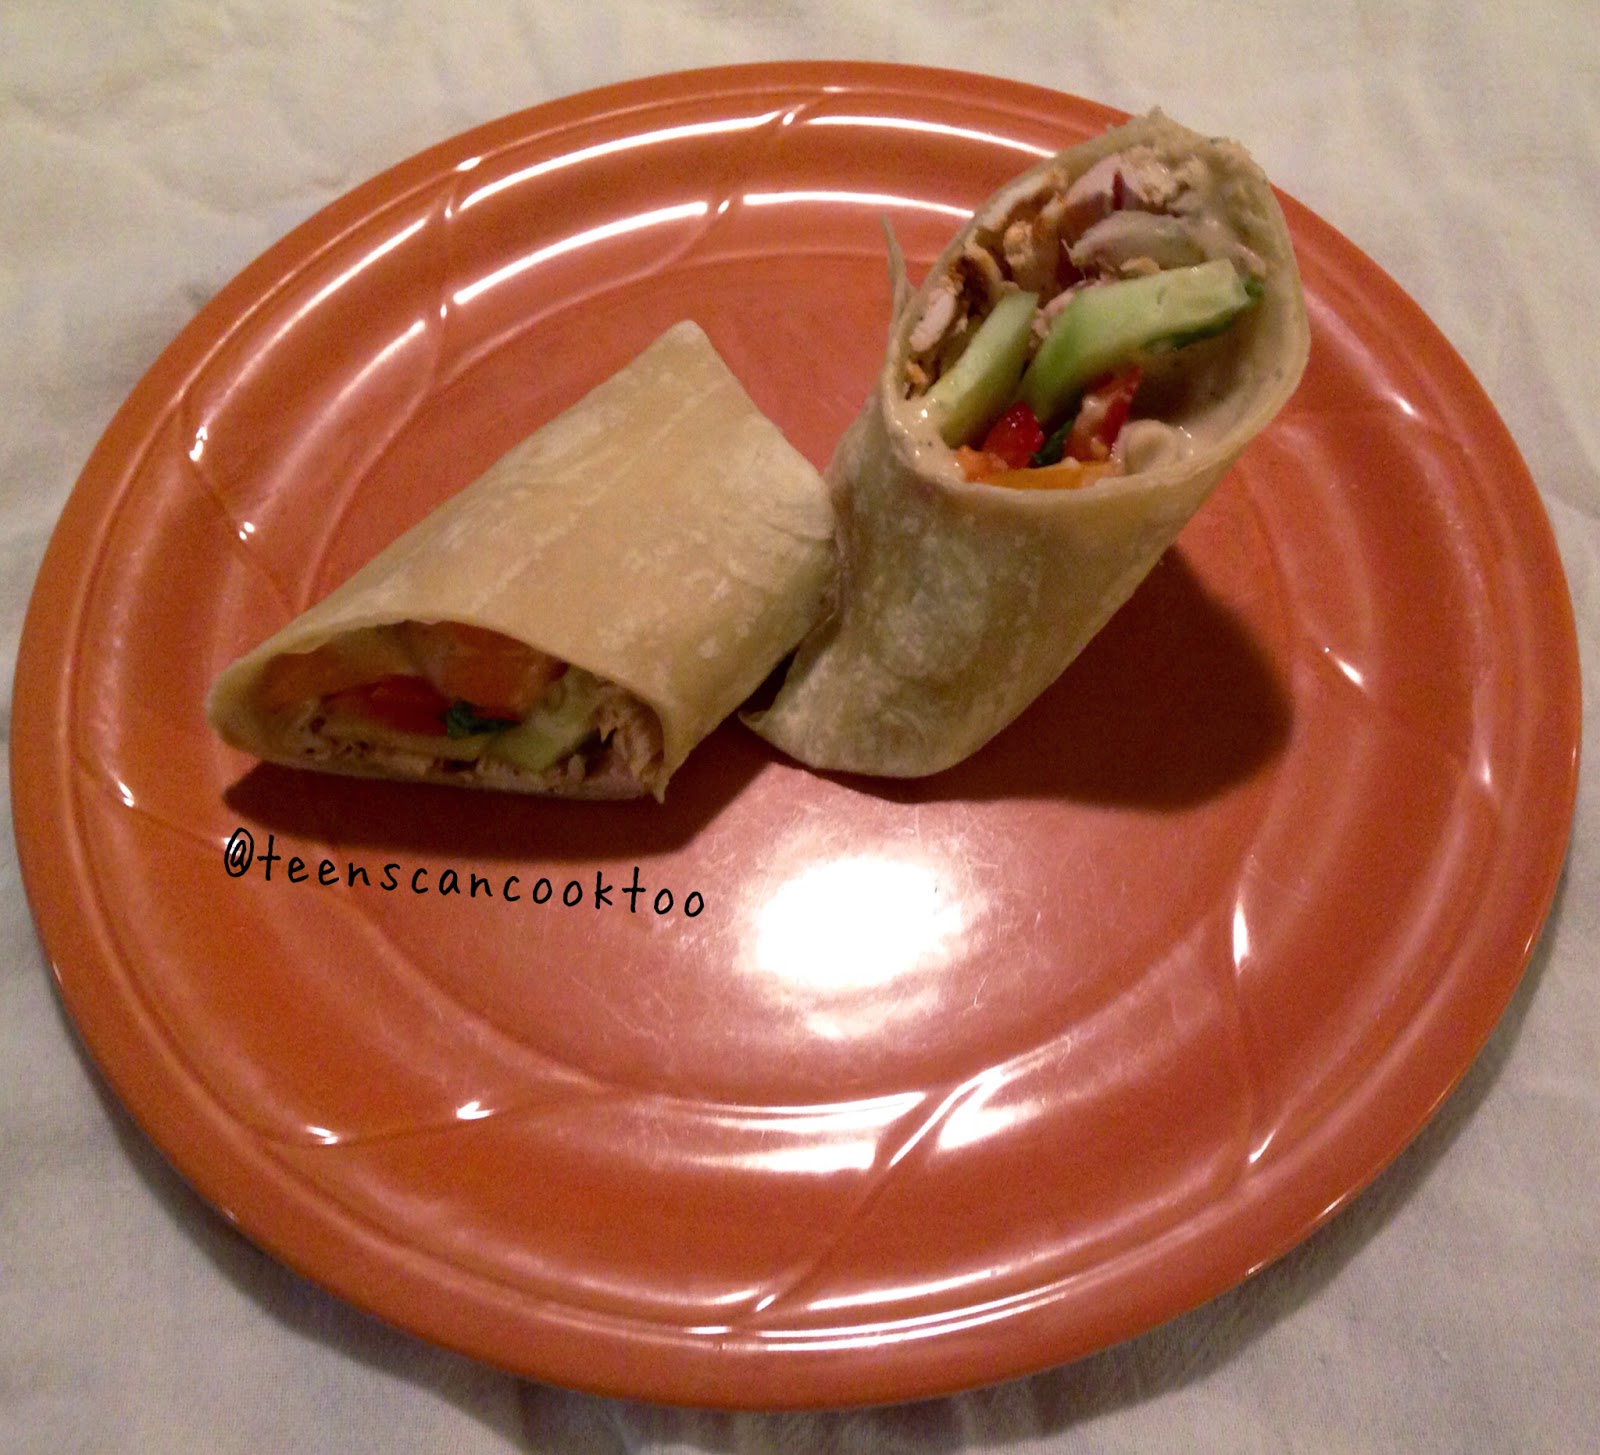
Chicken and White Bean Hummus Wraps

Hey, everybody! Teens Can Cook, Too is FINALLY back! I'm so sorry that I took such a long break this summer. I was doing so much and it just got too overwhelming. I promise you that I'm back for the entire school year, and you'll also be hearing a lot from the team members as well. We'll be posting more videos and keeping more active on social media, so keep an eye out!

As usual, we'll be sticking with the monthly themes. This month is: Back to School! Unfortunately, school is starting, which means our eating patterns are shifting into a more structured routine. It also means there's less time to cook, making it difficult to stay healthy. I'm really trying to set a solid foundation and routine for health this fall that will hopefully carry into the remaining seasons. This theme will have everything you need as school starts again: quick lunch recipes, super quick breakfasts that you can make even when you're rushing out the door, dinners that can be prepared and eaten in a short amount of time, and so much more. 

This week, I have a quick lunch recipe. I just made this for dinner, and I can honestly say that these are the best wraps I've ever made. The best part is that you can use a rotisserie chicken from your favorite grocery store - just be sure that the chickens were raised humanely. You can also leave the chicken out to make it vegan. The recipe may also make a little extra hummus, so save it and pack it as a snack for school the next day! Enjoy!


Chicken and White Bean Hummus Wraps 
Makes 4 whole wraps/8 half-wraps 

Ingredients
4 organic 8-inch tortillas, preferably whole-wheat
2 cups shredded rotisserie chicken, preferably antibiotic free and fed a vegetarian diet
1/2 of a medium-sized cucumber, 
1/2 of a red bell pepper
1 cup orange cherry tomatoes, halved 
1/2 cup julienned basil 
1/8 tsp smoked paprika
1/4 tsp cayenne pepper
Salt and lemon pepper/pepper, to taste 

For hummus:
1 (15 oz) can white beans, rinsed and drained 
2 large garlic cloves, peeled
2 tbsp fresh lemon juice 
A pinch of smoked paprika
1/4 tsp cayenne pepper 
1/4 tsp dried oregano
1/4 tsp dried thyme 
1/4 tsp dried parsley 
1/4 tsp dried basil 
Salt and lemon pepper/pepper, to taste 
2 tbsp extra-virgin olive oil 

Preparation 
1. Combine all the hummus ingredients, except the olive oil, in a Vita-Mix or food processor and begin blending on a low speed. As it blends, drizzle in the olive oil. Gradually increase the speed to high until you reach a very smooth consistency. If you want it to be thinner, add water. Adjust the seasonings and set aside.

2. Peel the half of the cucumber that you're using. Cut it in half lengthwise, and then thinly slice it. Cut the top off of the bell pepper and cut perpendicular to the membrane, leaving a hunk of seeds behind. Thinly slice half of the pepper. Set aside with other veggies.

3. Combine the paprika, cayenne, lemon pepper/pepper and salt with the shredded chicken. Stack the tortillas on top of each other, placing paper towels in between each of them. Microwave for 15 seconds on high to heat them, making them more pliable. 

4. To assemble the wrap, spread 1/4 cup of the hummus onto the tortilla evenly with a knife or the back of a spoon. On one end of the tortilla (about 2 inches from the bottom), add the chicken, cucumber, pepper, tomatoes and basil. Make sure you have about 1.5 inches on either side to fold the edges of the tortilla in. Fold these edges in, and then fold the bottom over. Carefully roll it away from yourself, tucking the edges in as you go. Keep it as tight as possible. Once it's all rolled up, cut it at an angle down the middle. To save these for school lunches, wrap each half in plastic wrap and refrigerate. Just pop as many halves as you'd like in your lunch with an ice pack. Enjoy!

That's all for this week! As much as we all don't like going back to school, I hope you have a great first few weeks back in the classroom. Remember to make healthy food choices! Please share your recreations with me using #teenscancooktoo on Instagram, and follow us at all the social media sites below: 


Stay healthy!
- Madeline